A skateboard leaning against the wall looks cool for about two days.
After that, it usually becomes the thing you keep moving with your foot every time you clean the room. One board turns into two boards, then a cruiser shows up, maybe an old deck you do not ride anymore, and suddenly the corner of your room looks like a messy skate shop storage area.
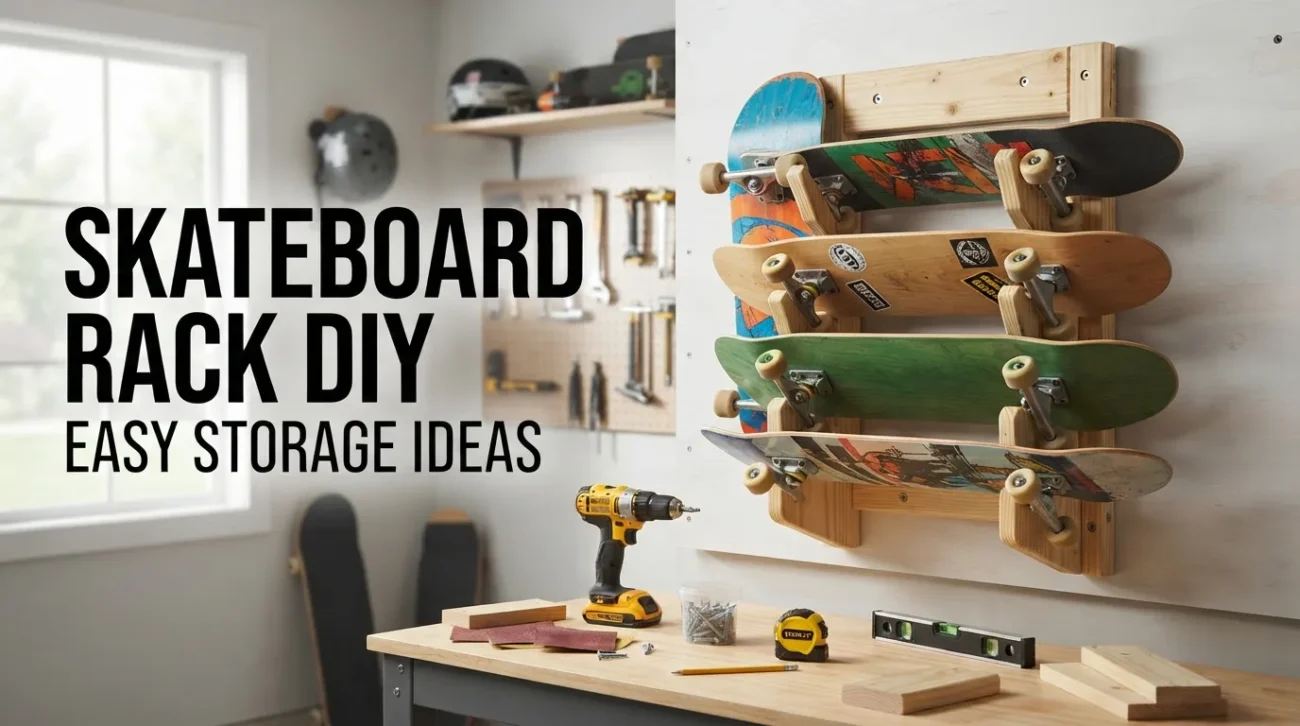
That is exactly why a skateboard rack DIY project makes sense.
You do not need a fancy setup. You do not need to buy an expensive display rack either. With a few basic tools, some wood, screws, wall anchors, or even simple hooks, you can build a rack that keeps your boards organized and still makes them look good.
I like DIY skateboard storage because it solves two problems at once. It keeps the room cleaner, and it turns your boards into part of the room design. A skateboard already has shape, color, graphics, and personality. When you store it properly, it looks intentional instead of cluttered.
Why Build a Skateboard Rack Yourself?
Table of Contents
The biggest reason is control.
When you build your own skateboard rack, you can decide the size, spacing, style, and placement. Store-bought racks are fine, but they may not fit your wall, your number of boards, or your room style.
A DIY rack also lets you use materials you already have. I have seen people build simple board racks from scrap wood, old shelves, metal hooks, PVC pipe, and even leftover plywood from other projects.
If you only have one board, a small wall rack is enough. If you have multiple boards, a vertical rack or floor-standing rack works better.
The key is to build something that matches how you actually use your boards. A display board and a daily ride should not always be stored the same way.
Before You Start: Count Your Boards
This sounds obvious, but do it first.
Count how many boards you want to store now, then add space for one or two more. Skateboard collections have a funny way of growing. Maybe you buy a cruiser later. Maybe you keep an old deck because the graphic looks too good to throw away.
If you build a rack for exactly two boards and later have four, you will be rebuilding sooner than expected.
For a small room, vertical storage usually saves the most space. For a garage or larger wall, horizontal storage can look cleaner.
Tools and Materials You May Need
Your exact materials depend on the type of rack you build, but these basics cover most DIY skateboard rack ideas:
- Wood board or plywood strip
- Wall hooks or wooden pegs
- Screws
- Wall anchors
- Drill
- Screwdriver
- Measuring tape
- Pencil
- Level
- Sandpaper
- Saw, if cutting wood
- Stud finder, optional but helpful
- Wood stain or paint, optional
For hooks, choose something strong enough to hold the board safely. Thin decorative hooks may look nice, but they may bend or loosen over time.
If you are mounting into drywall, wall anchors are important. If you can mount into studs, that is even better.
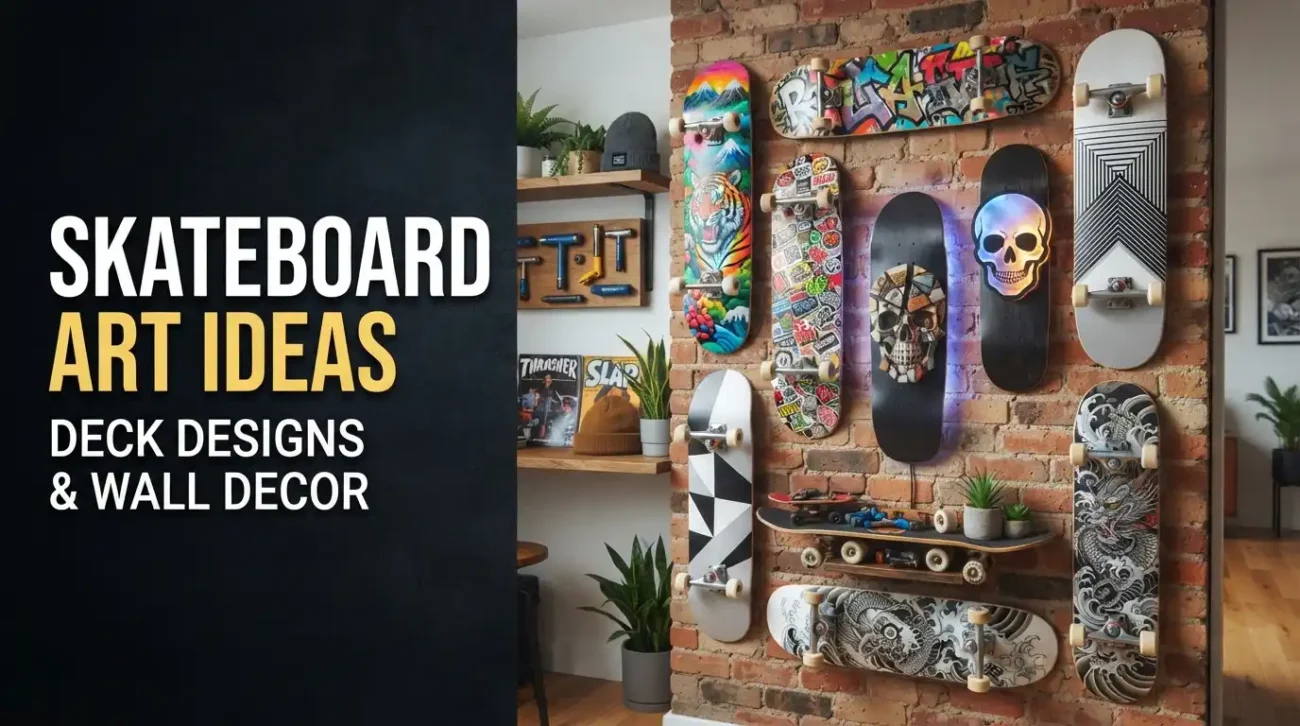
Idea 1: Simple Wall Hook Skateboard Rack

This is the easiest version.
You mount two hooks on the wall, spaced wide enough to hold the skateboard by the deck or trucks. The board can sit horizontally like a display piece.
This works really well if you want one board to stand out. It is also great for a deck with a nice graphic.
How to build it
First, choose the wall spot. Hold the skateboard against the wall and decide the height. Use a pencil to mark where the hooks should go.
Use a level so the board does not sit crooked. Drill pilot holes, add wall anchors if needed, then screw in the hooks.
Place the board on the hooks and check if it feels stable.
The first mistake people make here is placing the hooks too close together. If the hooks are too close, the board can tilt. If they are too far apart, the board may not sit naturally. Test the spacing before drilling.
Idea 2: Vertical Skateboard Rack

A vertical rack is better when you have several boards and limited wall space.
Instead of hanging one board across the wall, you store boards upright. This can be done with a wooden strip and angled pegs, or with a narrow floor rack.
A vertical wall rack is one of my favorite setups because it keeps boards easy to grab. It also works well in bedrooms, garages, skate rooms, and small apartments.
How to build it
Use a long wooden board as the back support. Sand it smooth and mark the positions for pegs or hooks. Space each board position evenly.
Attach wooden dowels, angled pegs, or strong hooks. Then mount the wooden strip to the wall using screws and anchors.
Make sure the rack is attached strongly because multiple boards add weight.
If the boards are complete skateboards with trucks and wheels, allow enough spacing so the wheels do not bump into each other.
Idea 3: Floor-Standing Skateboard Rack

A floor rack is useful if you do not want to drill into the wall.
This is a good option for rentals, dorm rooms, or anyone who likes to move furniture around. It can sit in a corner and hold several boards upright.
You can build it from plywood or wood strips. The idea is simple: create slots at the bottom where each board can stand, then add a back support so the boards do not fall.
How to build it
Cut a base board wide enough for your boards. Add small wooden dividers or slots where the skateboard wheels or deck can rest.
Then add a vertical back support. This keeps the boards leaning safely without sliding out.
The rack does not need to be huge, but it should be stable. A narrow base can tip over if you load it with several boards.
If you are building this for a garage, make the base heavier or wider.
Idea 4: Skateboard Rack with Pegs

This is a clean and simple design.
You use a wooden wall strip and install pegs that hold each skateboard. The boards can rest by the trucks, wheels, or deck depending on spacing.
Wooden pegs look warmer and more natural than metal hooks. They also work nicely if you want the rack to feel like room decor instead of garage storage.
How to build it
Start with a sanded wood strip. Measure and mark where each peg will go. Drill holes slightly smaller than the peg size, apply wood glue, and push the pegs into place.
Let the glue dry fully before mounting the rack.
Then attach the rack to the wall with screws. Use a level and wall anchors if needed.
A common mistake is using pegs that are too short. Short pegs may not hold the board securely. Use pegs long enough to support the board without making the rack look bulky.
Idea 5: Skateboard Rack for a Garage

Garage storage is different from bedroom storage.
In a garage, you probably care more about durability than appearance. Boards may be stored near bikes, tools, helmets, pads, and other gear.
For a garage rack, use stronger hooks, thicker wood, and better wall support. Mount into studs whenever possible.
A garage skateboard rack can also include space for helmets, knee pads, skate tools, and shoes.
Simple garage setup
Use a strong wooden board mounted horizontally to the wall. Attach heavy-duty hooks for skateboards. Add smaller hooks underneath for helmets or pads.
This keeps everything in one place, which is helpful when you are trying to leave quickly and do not want to search for your gear.
Idea 6: Skateboard Rack for Kids’ Boards

Kids’ boards are smaller and lighter, but the rack still needs to be safe.
Do not mount it too high. If a child needs to climb or pull the board down awkwardly, the rack becomes annoying and unsafe.
A low vertical rack works well for kids because they can slide the board in and out easily.
Use rounded hooks or smooth pegs. Avoid sharp metal edges.
If you are building a rack in a kid’s room, you can paint it in bright colors or match the skateboard graphics.
Step-by-Step: Build a Basic DIY Skateboard Rack
If you want one simple project that works for most people, build a wall-mounted wooden peg rack.
It is clean, affordable, and easy to customize.
Step 1: Choose the Rack Location

Pick a wall where the boards will not block walking space.
Avoid spots behind doors, narrow hallways, or areas where people may bump into the boards. A bedroom wall, garage wall, or corner near the entryway works well.
Hold a skateboard against the wall to test the height and spacing.
Step 2: Measure Your Boards

Measure the width of your boards, including trucks and wheels if they are complete setups.
This helps you decide peg spacing. If the spacing is too tight, the boards will overlap awkwardly.
For multiple boards, leave some breathing room between them.
Step 3: Cut and Sand the Wood

Cut your wooden strip to the size you need.
Sand the edges so it feels smooth. This step makes the rack look cleaner and prevents splinters.
If you want, paint or stain the wood before installing the pegs. Let it dry properly.
Step 4: Mark Peg Positions

Use a pencil and measuring tape to mark where each peg will go.
Keep the spacing even. Uneven spacing makes the rack look homemade in a bad way.
Use a level or straight edge to keep the marks aligned.
Step 5: Drill Holes for Pegs

Drill holes where you marked the peg positions.
Do not drill all the way through unless your design requires it. The holes should be deep enough to hold the pegs securely.
Test-fit the pegs before adding glue.
Step 6: Attach the Pegs

Add wood glue into the holes and insert the pegs.
Wipe away extra glue. Make sure the pegs are straight and angled correctly if your design uses angled pegs.
Let the glue dry fully. Do not rush this part.
Step 7: Mount the Rack to the Wall

Hold the rack against the wall and use a level.
Mark the screw holes. Drill pilot holes. Add wall anchors if you are not drilling into studs.
Then screw the rack into the wall.
Give it a gentle pull to make sure it is secure.
Step 8: Test with One Board First

Do not load all your boards immediately.
Place one skateboard on the rack and check how it sits. Look for wobbling, bending, or loose screws.
If everything feels solid, add the rest of the boards.
Best Placement for a Skateboard Rack
The best spot depends on how you use your boards.
If you ride daily, place the rack near the door, garage entrance, or bedroom exit. You want it easy to grab.
If the boards are mostly for display, place the rack on a clean wall with good visibility.
If you have expensive or collectible decks, avoid damp areas, direct sunlight, or places where they can get hit by other items.
Moisture can damage wood over time, and sunlight can fade graphics.
Wall Rack vs Floor Rack
A wall rack looks cleaner and saves floor space. It is best for bedrooms, studios, and small rooms.
A floor rack is easier to move and does not require drilling. It is better for rentals, garages, or temporary setups.
If you only have one or two boards, wall storage looks better. If you have many boards and gear, a floor rack may be more practical.
Common Mistakes to Avoid
The first mistake is using weak hardware.
A skateboard is not extremely heavy, but multiple boards create weight. Use strong screws, anchors, and hooks.
The second mistake is ignoring wall studs. If you can mount into studs, do it. It makes the rack much stronger.
Another mistake is placing boards too close together. They may scratch each other, especially if the trucks and wheels touch.
Also, do not place the rack too high if you use the board often. A rack should make life easier, not turn every ride into a stretching exercise.
And finally, avoid overcrowding the rack. A clean setup always looks better.
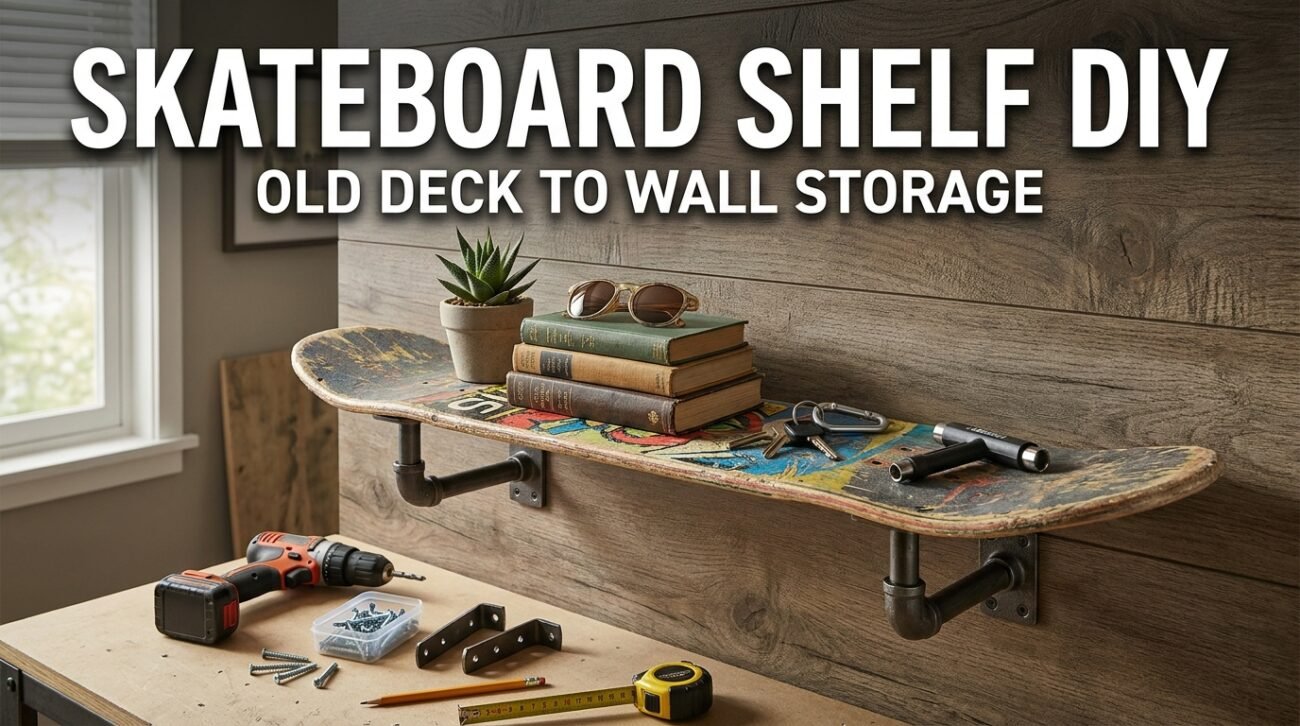
Can You Use an Old Skateboard as the Rack?
Yes, and it can look really cool.
You can mount an old skateboard deck horizontally on the wall and attach hooks underneath it. This creates a rack made from a skateboard.
It works well for keys, helmets, small bags, or even another board depending on the hardware. Just make sure the old deck is mounted securely.
This is a nice idea if you want your storage to feel more creative and skater-inspired.
How Much Does a DIY Skateboard Rack Cost?
A simple rack can be very cheap.
If you already have scrap wood and screws, you may only need hooks or pegs. If you buy everything new, the cost depends on wood quality and hardware.
A basic wall rack can usually be made with simple materials. A larger floor rack may cost more because it needs more wood and stronger support.
The good thing is that you can start small and upgrade later.
Final Thoughts
A skateboard rack DIY project is one of the most useful upgrades you can make if your boards are always leaning against walls, sliding under furniture, or cluttering up the garage.
You can keep it simple with two hooks, build a clean wooden peg rack, or make a full floor-standing rack for multiple boards. The best design is the one that fits your space and how often you ride.
Take your time with measuring, use strong hardware, and do not skip wall anchors if you need them. Once the rack is up, your boards will look organized instead of messy.
And honestly, seeing your boards lined up neatly on the wall feels pretty good. It makes the room look cleaner, and it gives your skateboards the place they deserve.