The first time I noticed my skateboard tail wearing down badly, I ignored it.
At first, it was just a little scrape. Then the wood started looking rough. After a few weeks of dragging the tail, stopping with it, and messing around on rough concrete, the end of the deck started getting thinner than I liked. It was not completely destroyed, but it had that chewed-up look that tells you the board is slowly losing life.
That is usually when people start thinking about a skid plate.
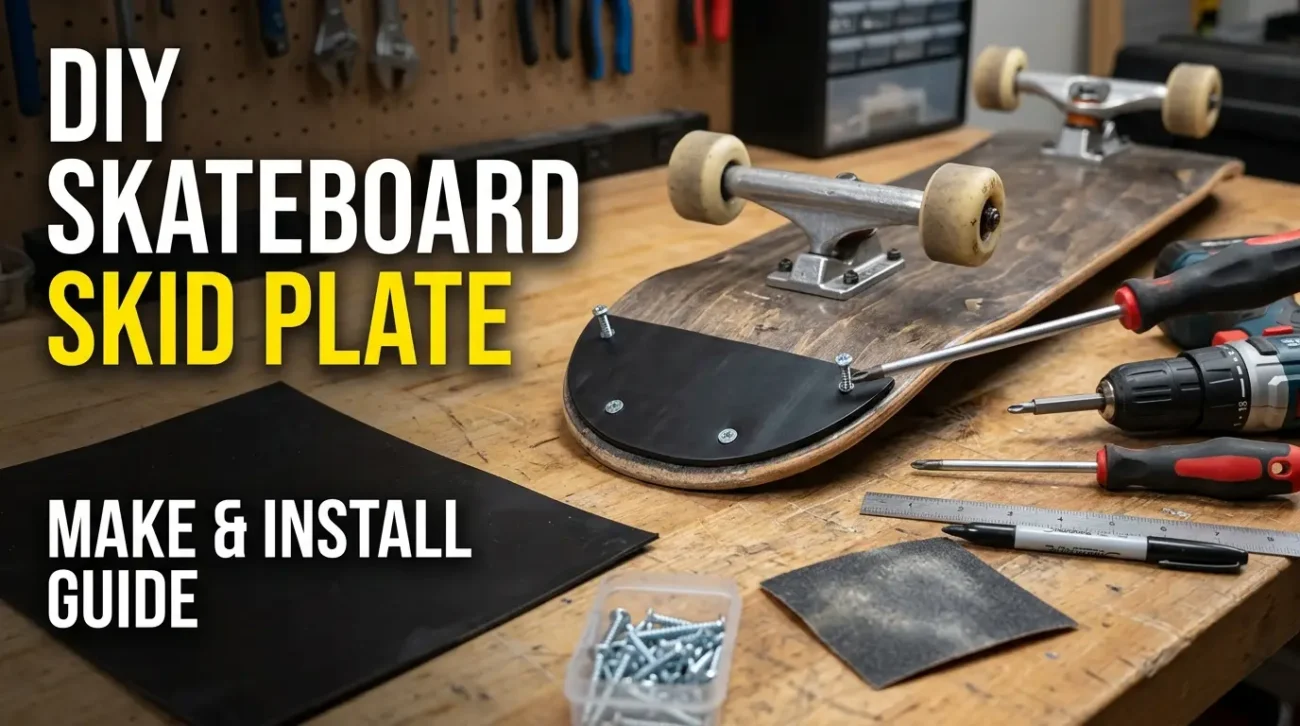
A skateboard skid plate is a small protective piece that sits on the tail, nose, or both ends of a skateboard deck. Its job is simple: it takes the scraping instead of your deck. You can buy ready-made ones, but if you enjoy small DIY projects, you can make one at home with basic tools and a bit of patience.
A DIY skateboard skid plate is not something every skater needs. If you mostly cruise, do flip tricks, or ride smooth skateparks, you may not care much. But if you drag your tail a lot, ride rough streets, practice old-school tricks, or want to protect a deck you really like, it can be a useful little upgrade.
The important thing is to make it properly. A badly installed skid plate can feel annoying, catch on the ground, mess with your pop, or even split the deck if you drill carelessly.
Here is how to make and install one without turning your skateboard into a weird garage experiment.
What a Skateboard Skid Plate Actually Does
Table of Contents
A skid plate protects the end of your skateboard deck from scraping against the ground.
Most skaters think about skid plates for the tail because that is where the most damage usually happens. Tail stops, quick pivots, manuals gone wrong, and casual dragging all wear down the wood over time.
Some riders also install one on the nose, especially on old-school boards or cruisers. But for a regular street skateboard, the tail is the most common spot.
A skid plate can help with:
- Reducing tail wear
- Protecting the deck from rough concrete
- Making tail stops less damaging
- Extending the life of a favorite board
- Adding an old-school custom look
But it also changes the feel slightly.
That is the honest part many guides skip. A skid plate adds a little weight and thickness to the tail. It may make the board feel different when you pop tricks. Some skaters like that solid scraping feel, while others hate it after one session.
So before you drill holes into a new expensive deck, test the idea on an older board if possible.
Best Materials for a DIY Skateboard Skid Plate
You do not need anything fancy, but the material matters.
The skid plate needs to be tough enough to scrape against concrete, but not so thick or heavy that it ruins the board feel.
Plastic Cutting Board
A cheap plastic cutting board is one of the easiest DIY materials. It is strong, easy to cut, and slides fairly well. You can find one at home or buy a small one from a discount store.
Look for a cutting board that is not too thick. Around 3mm to 5mm is usually easier to work with.
Old Plastic Container Lid
This can work for a light-duty skid plate, but it is not my favorite choice. Some lids are too soft or brittle. They may crack when drilled or wear down quickly.
Use this only if you are testing the idea and do not expect it to last long.
Nylon or UHMW Plastic
If you want a cleaner and tougher result, nylon or UHMW plastic is better. UHMW plastic is commonly used where low friction and durability matter. It slides nicely and handles scraping better than random household plastic.
The downside is that it may be harder to find and slightly harder to cut cleanly.
Thin Metal Plate
Metal looks cool, but I would not recommend it for most beginners.
It can be noisy, slippery in a weird way, harder to shape, and less forgiving if installed badly. It can also damage surfaces more aggressively. For most DIY skateboard skid plates, plastic is the safer and easier choice.
Tools You Will Need
You can keep this project simple. You do not need a full workshop.
Here are the basic tools:
- Plastic sheet or cutting board
- Pencil or marker
- Ruler or measuring tape
- Utility knife, coping saw, jigsaw, or small hand saw
- Sandpaper or file
- Drill
- Small drill bit
- Screws
- Screwdriver
- Clamps, optional but helpful
For screws, use small countersunk screws if you can. They sit flatter and feel cleaner under the board. Avoid screws that are too long. You do not want sharp ends coming through the top of the deck.
That mistake sounds obvious, but it happens.
Before drilling, hold the screw against the deck and skid plate together. If it looks too long, it probably is.
Step 1: Decide Where the Skid Plate Will Go

Most people install the skid plate on the tail.
Flip your skateboard over and look at the tail area. You want the plate to cover the part that hits the ground, but you do not want it to extend too far toward the trucks.
A good size is usually a curved piece that follows the tail shape and covers the last few inches of the board.
Do not make it huge.
A giant skid plate might look protective, but it adds weight and can interfere with how the tail feels. Start small and clean.
If your deck already has bad razor tail, trim expectations. A skid plate can slow down more damage, but it will not magically restore missing wood.
Step 2: Trace the Tail Shape

Place your plastic material under the skateboard tail.
Use a pencil or marker to trace the curve of the deck. Try to follow the natural rounded shape of the tail. If you want a cleaner look, make the skid plate slightly smaller than the deck outline so it does not hang over the edges.
This is one of those small details that makes the final result look intentional instead of homemade in a bad way.
After tracing the outside curve, mark how far inward you want the plate to go. For most boards, a short piece is enough.
You are not trying to cover half the deck. You are just protecting the contact area.
Step 3: Cut the Skid Plate

Now cut the shape carefully.
If you are using a thin plastic cutting board, a utility knife may work if you score it several times and snap it. For thicker plastic, use a coping saw, jigsaw, or small hand saw.
Do not rush this part.
If the edges come out rough, that is fine. You will clean them up next. But try not to cut inside your marked line too much. It is easier to sand extra material away than to fix a piece that is too small.
Once cut, place the skid plate against the board and check the shape.
If it sticks out awkwardly, trim it. If one side looks uneven, sand it down.
Step 4: Smooth the Edges

Use sandpaper or a file to round the edges.
This matters more than people think. A sharp plastic edge can catch on cracks or feel rough when scraping. Rounded edges slide better and look cleaner.
Focus especially on the back edge of the skid plate because that is the part most likely to touch the ground.
I like to slightly bevel the scraping edge. It does not need to be perfect. Just remove the sharp corner so it does not dig into the concrete immediately.
Also smooth the sides so they do not hang over or feel jagged.
Step 5: Mark the Screw Holes

Place the skid plate on the skateboard tail exactly where you want it.
Mark two or three screw holes. Two screws can work for a small plate, but three screws usually hold better and reduce twisting.
Do not place screws too close to the edge of the deck. If you drill too close to the edge, the wood can split or weaken.
A good rule is to keep the holes slightly inward from the edge and spaced evenly.
Also avoid drilling into areas where the deck is already cracked or badly worn.
Step 6: Drill Pilot Holes

This step is important.
Do not just force screws straight into the deck. Drill small pilot holes first. Pilot holes reduce the chance of splitting the wood and make the screws go in cleaner.
Use a drill bit slightly smaller than the screw diameter.
Drill slowly. You only need to go deep enough for the screw to bite properly. Be careful not to drill through the top of the deck.
If you are nervous, put tape on the drill bit as a depth marker. That way, you can see when to stop.
Also drill matching holes through the skid plate. If you want the screws to sit flatter, gently countersink the holes in the plastic. You can do this with a countersink bit or carefully widen the top of the hole.
Step 7: Attach the Skid Plate

Now place the skid plate on the tail and install the screws.
Tighten them evenly.
Do not overtighten. This is another common mistake. If you crank the screws too hard, you can crack the plastic, strip the hole, or stress the deck.
The plate should sit firm with no wobble. If it moves, check your screw placement or add another screw.
Once installed, run your hand over the plate and screws. Nothing should feel sharp or loose.
Then set the board on the ground and gently test how the tail contacts the surface.
Do not go straight into aggressive skating yet. Ride slowly first.
Step 8: Test the Board

Take the board outside and test it on smooth ground.
Try a few slow tail touches, pivots, and light stops. Pay attention to how it feels.
A good DIY skateboard skid plate should feel stable and predictable. It may sound different when it scrapes, but it should not rattle, flex badly, or catch on the ground.
If it feels too bulky, you may need to sand the back edge more.
If the board feels strange when popping tricks, that is normal to some degree. You added material to the tail, so the response can change. Some skaters adjust quickly. Others decide the protection is not worth the change.
That is why I do not recommend installing a skid plate on your best deck first.
Common Mistakes to Avoid
The biggest mistake is using plastic that is too thick.
A thick skid plate may seem stronger, but it can make the tail feel clunky. It also changes the angle of contact with the ground. A thinner, cleaner plate usually feels better.
Another mistake is using screws that are too long. If the screws come through the top of the deck, you have created a real problem. They can damage your shoes, grip tape, or even your foot if they are sharp.
Drilling too close to the edge is also risky. Skateboard decks are made of layered wood, and once the edge starts splitting, it can get worse over time.
Some people also make the plate too large. A skid plate should protect the tail, not cover the whole bottom of the deck.
And finally, do not ignore looseness. If the skid plate starts rattling, fix it before skating harder. Loose hardware can damage the holes and make the plate harder to secure later.
Does a DIY Skid Plate Affect Skateboard Pop?
Yes, it can.
Even a small skid plate adds weight and changes how the tail hits the ground. If you are doing a lot of ollies, kickflips, or technical street tricks, you may notice the difference.
For casual cruising, old-school tricks, freestyle, or protecting a board from tail scraping, the tradeoff can be worth it.
For serious trick skating, you may prefer to skip the skid plate and simply replace the deck when the tail wears down too much.
That is the honest answer. A skid plate protects the deck, but it is not free performance. There is always some tradeoff.
When a Skid Plate Makes Sense
A skateboard skid plate makes the most sense if you:
- Drag your tail often
- Use tail stops
- Ride rough streets
- Have an old-school or cruiser setup
- Want to protect a deck graphic
- Like DIY board customization
- Are using an older deck for experiments
It makes less sense if you:
- Do mostly flip tricks
- Care a lot about light board feel
- Skate only smooth parks
- Do not drag your tail much
- Are using a fresh expensive deck and unsure about drilling it
This is one of those upgrades that depends on your skating style.
For one skater, it is a smart protection piece. For another, it is unnecessary weight.
Can You Install a Skid Plate Without Drilling?
You can try heavy-duty adhesive tape or strong glue, but I would not fully trust it for serious scraping.
Adhesive can work for a temporary test. It lets you feel the size and placement before drilling. But once the tail starts scraping the ground, glue can peel, shift, or fail.
If you want the skid plate to actually stay in place, screws are usually better.
That said, if you are worried about damaging the deck, test with removable tape first. Ride lightly and see if you even like the feel. Then decide if drilling is worth it.
Maintenance After Installation
After a few sessions, check the screws.
Skateboards vibrate a lot, especially on rough pavement. Screws can loosen over time. If they do, tighten them gently.
Also check the skid plate edges. If they become sharp or uneven, sand them again.
If the plastic wears down too much, replace it. The whole point is for the skid plate to take damage instead of the deck. It is supposed to wear out eventually.
Do not keep riding it if the screws are exposed or the plate is cracked badly.
A Simple DIY Setup That Works
If I were making a simple DIY skateboard skid plate again, I would use a thin plastic cutting board, make a small curved tail piece, use three short countersunk screws, and sand the edges smooth.
Nothing fancy.
No giant metal plate. No oversized shape. No heavy hardware.
Just a clean piece that protects the tail without making the board feel ridiculous.
That is the key with this project: keep it simple.
A DIY skateboard skid plate should solve a problem, not create five new ones.
Final Thoughts
Making a DIY skateboard skid plate is a small project, but it teaches you a lot about how your board wears down.
You start noticing where the tail scrapes, how often you drag it, and how small changes can affect the board’s feel. That alone makes the project useful, even if you decide later that skid plates are not for your main setup.
If your skateboard tail is wearing down quickly, a homemade skid plate can help protect it and give your deck a little more life. Just use the right material, keep the plate small, drill carefully, and test it slowly before skating hard.
The best version is not the biggest or toughest-looking one.
It is the one that protects the deck without getting in your way.