I still remember the first time I looked at an old skateboard deck sitting in the corner of my room and thought, “This board is too scratched to ride, but too cool to throw away.”
The grip tape was worn down, the tail had some razor marks, and the graphic underneath had plenty of scratches from real use. But that was exactly what made it worth keeping. It had character. It looked like a board that had actually been outside, hit curbs, scraped concrete, and survived a few bad landings.
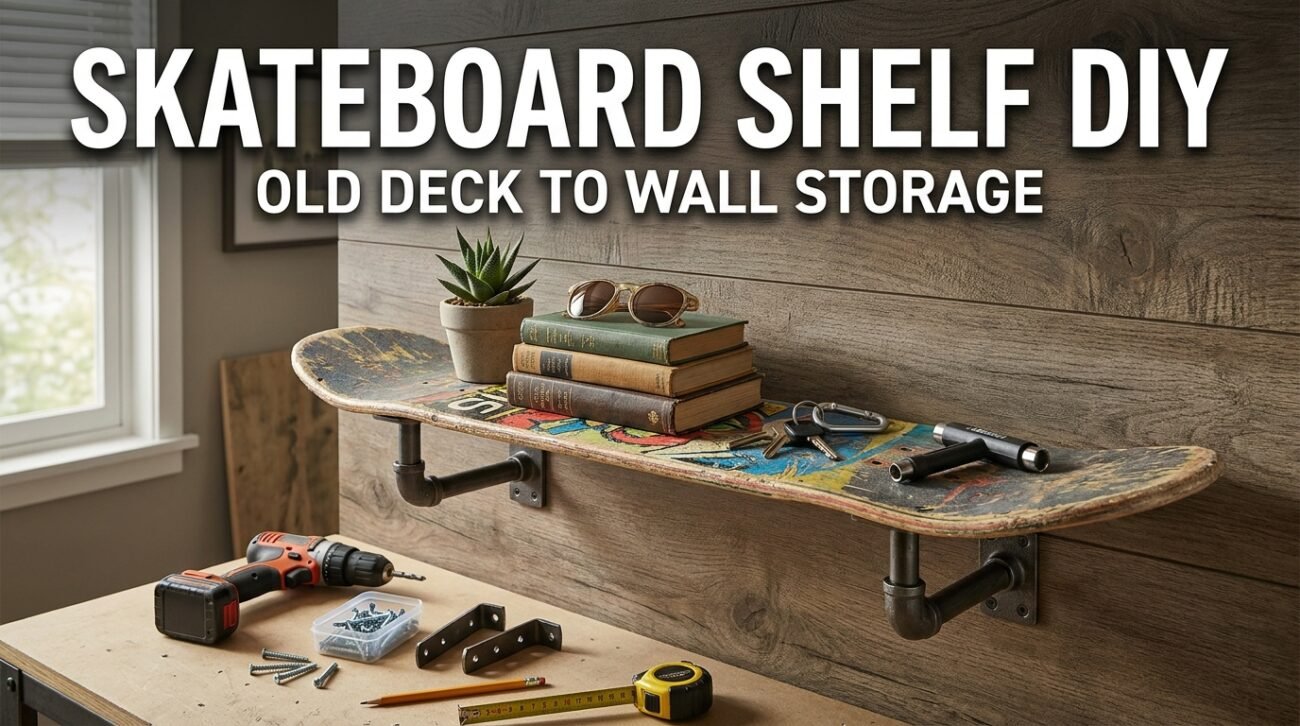
So instead of letting it collect dust, I turned it into a wall shelf.
And honestly, a skateboard shelf DIY project is one of the easiest ways to reuse an old deck. You do not need to be a professional woodworker. You do not need a fancy garage setup. You just need a skateboard deck, basic brackets, screws, a drill, and a little patience.
The best part is that the final shelf actually looks good. It can hold books, small plants, keys, sunglasses, action figures, small speakers, or skate tools. It also gives your room that clean skater-style look without feeling like a random decoration stuck on the wall.
Why an Old Skateboard Deck Makes a Great Shelf
Table of Contents
A skateboard deck already has the right shape for a shelf. It is long, slightly curved, strong enough for light items, and usually has a graphic that looks better than plain wood.
If you have an old deck with a design you like, you can mount it with the graphic facing up or down depending on the look you want. If the graphic is the best part, many people install the shelf so the bottom graphic is visible from below. If you want a cleaner surface for items, you can keep the grip tape side up, but that can scratch softer objects.
From my experience, a deck works best as a light storage shelf, not a heavy-duty shelf. It is perfect for display items, small decor, or everyday small things. It is not the shelf where you should stack heavy textbooks or a full toolbox.
What You Need for This DIY Skateboard Shelf
Before starting, gather everything first. The first time I did this, I made the mistake of starting with only half the tools nearby. I had the brackets and deck ready, but I had to stop halfway because I did not have the right wall anchors. It slowed down the whole project.
Here is what you need:
- Old skateboard deck
- Two strong shelf brackets
- Screws
- Wall anchors
- Drill
- Screwdriver
- Measuring tape
- Pencil
- Level
- Stud finder, if available
- Sandpaper, optional
- Cleaning cloth
For brackets, simple L-shaped metal brackets work fine. Choose brackets that are wide enough to support the skateboard deck properly. Very tiny brackets may look clean, but they can make the shelf unstable.
If you are mounting into drywall, wall anchors are important. If you can screw into wall studs, that is even better.
Step 1: Choose the Right Skateboard Deck

Not every old deck is ideal for a wall shelf. A slightly used deck is great. A completely cracked deck is not.
Check the deck for deep cracks, soft spots, or major splits near the truck holes. If the board flexes too much or feels weak, do not use it for holding items. It might still work as wall art, but not as a shelf.
A standard popsicle skateboard deck works well. Cruiser decks can also work, but their shape may make the shelf look less even. Longboard decks can make bigger shelves, but they need stronger brackets and better wall support.
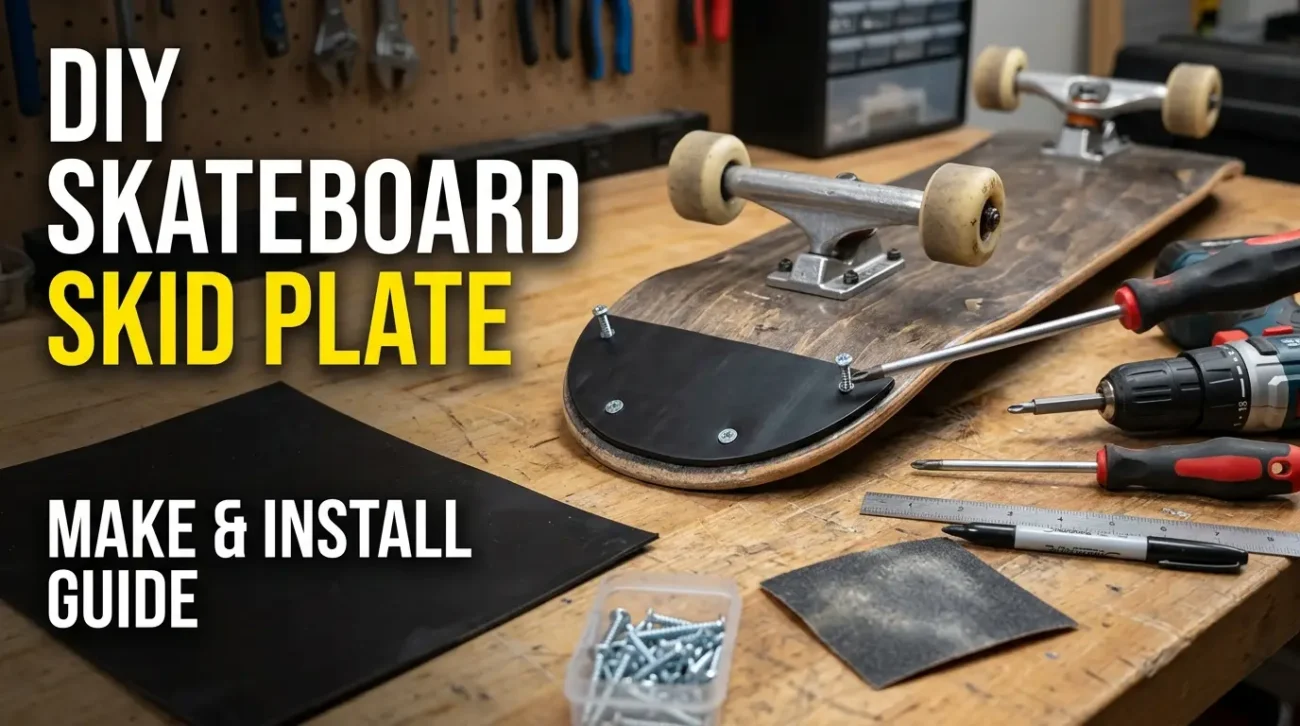
If your deck still has trucks and wheels attached, remove them first. You can keep the trucks for another project or use them as decorative hooks later.
Step 2: Clean the Deck

Old skateboard decks usually carry dirt, dust, grip tape debris, and marks from outdoor use. Clean the board before putting it on your wall.
Use a dry cloth first. Then use a slightly damp cloth on the wood side. Do not soak the deck with water because skateboard decks are made from layered wood, and too much moisture is not good for them.
If the grip tape is extremely dirty, use a soft brush. You do not need to make it look brand new. Actually, a few scuffs make it look more authentic.
If there are rough edges, lightly sand them. This helps prevent splinters and makes the shelf feel more finished.
Step 3: Decide Which Side Faces Up

This is where the design choice matters.
If you keep the grip tape side up, items will sit more securely because grip tape has texture. But it can scratch things like phone cases, sunglasses, painted decor, or soft-bottom items.
If you keep the graphic side up, the shelf looks cleaner from above, but items may slide more easily because the surface is smoother.
My personal favorite is graphic side down and grip tape side up if the shelf is above eye level. That way, people can see the graphic from below. But if the shelf is lower, graphic side up usually looks better.
A good middle option is to remove the grip tape and sand the top surface, but that takes extra time and can get messy. For a simple DIY skateboard shelf, I would keep it easy.
Step 4: Mark the Bracket Positions on the Deck

Place the skateboard deck on a table and decide where the brackets should go.
Do not place the brackets too close to the center. The shelf will feel wobbly. Do not place them too far toward the curved nose and tail either, because the board shape may make the bracket contact uneven.
A good position is usually a little inside the old truck holes. This gives the shelf balanced support.
Use a pencil to mark where the bracket screws will go. Make sure both brackets are aligned evenly. If one bracket is slightly forward and the other is slightly back, the shelf may sit crooked.
This is a small detail, but it matters.
Step 5: Drill Pilot Holes in the Skateboard Deck

Pilot holes make the screws easier to install and reduce the chance of splitting the wood.
Use a drill bit that is slightly smaller than your screws. Drill slowly. You do not need to push hard.
One mistake people make is drilling too aggressively. Skateboard decks are strong, but they are still layered wood. If you force the drill, you can damage the area around the hole.
After drilling, check that the screws fit properly through the bracket and into the deck.
Step 6: Attach the Brackets to the Deck

Now attach the brackets to the skateboard deck.
Use a screwdriver or drill on a low setting. Do not overtighten the screws. If you tighten too much, the screw can strip the wood or pull too deep into the deck.
Once both brackets are attached, place the shelf on a flat surface and check if it stands evenly. If one bracket is not straight, fix it before mounting the shelf to the wall.
This is easier to correct now than after it is on the wall.
Step 7: Mark the Wall

Hold the skateboard shelf against the wall where you want it.
Use a level to make sure it is straight. This is one of those steps that feels unnecessary until you skip it and end up with a shelf that looks slightly tilted forever.
Mark the bracket holes on the wall with a pencil.
Think about height too. If the shelf is for keys or small everyday items, place it somewhere easy to reach. If it is mostly decorative, you can place it higher.
Also avoid placing it where people might bump into it, especially because skateboard decks have rounded but still noticeable ends.
Step 8: Use Wall Anchors or Studs

This step depends on your wall.
If you are drilling into studs, use screws that are long enough to hold securely. If you are drilling into drywall, use proper wall anchors.
Do not skip anchors on drywall. A skateboard deck is not extremely heavy, but once you add items on top, the weight increases. Without anchors, screws can slowly loosen.
I learned this with a small shelf years ago. It looked fine for a week, then started leaning forward because the screws were not properly supported. Since then, I always use anchors when I am not sure.
Step 9: Mount the Skateboard Shelf

Line up the brackets with the wall marks and screw the shelf into place.
Tighten each screw gradually instead of fully tightening one side first. This helps keep the shelf level.
Once installed, gently press down on the shelf with your hand. It should feel solid. If it moves, check the screws, anchors, and bracket position.
Do not load it with items until you are confident it is stable.
Step 10: Style the Shelf

Now comes the fun part.
A skateboard shelf looks best when it is styled lightly. Do not overcrowd it. The deck itself is already part of the design, so let it show.
Good items to place on a skateboard shelf include:
- Small plant
- Skate tool
- Sunglasses
- Small books
- Mini speaker
- Keys
- Small lamp
- Collectible figures
- Wallet
- Framed photo
- Candle, only if safely placed and not lit near the wall
For a bedroom, it works well above a desk or near a gaming setup. For a hallway, it can become a key shelf. For a skate-themed room, you can mount two or three decks as matching shelves.
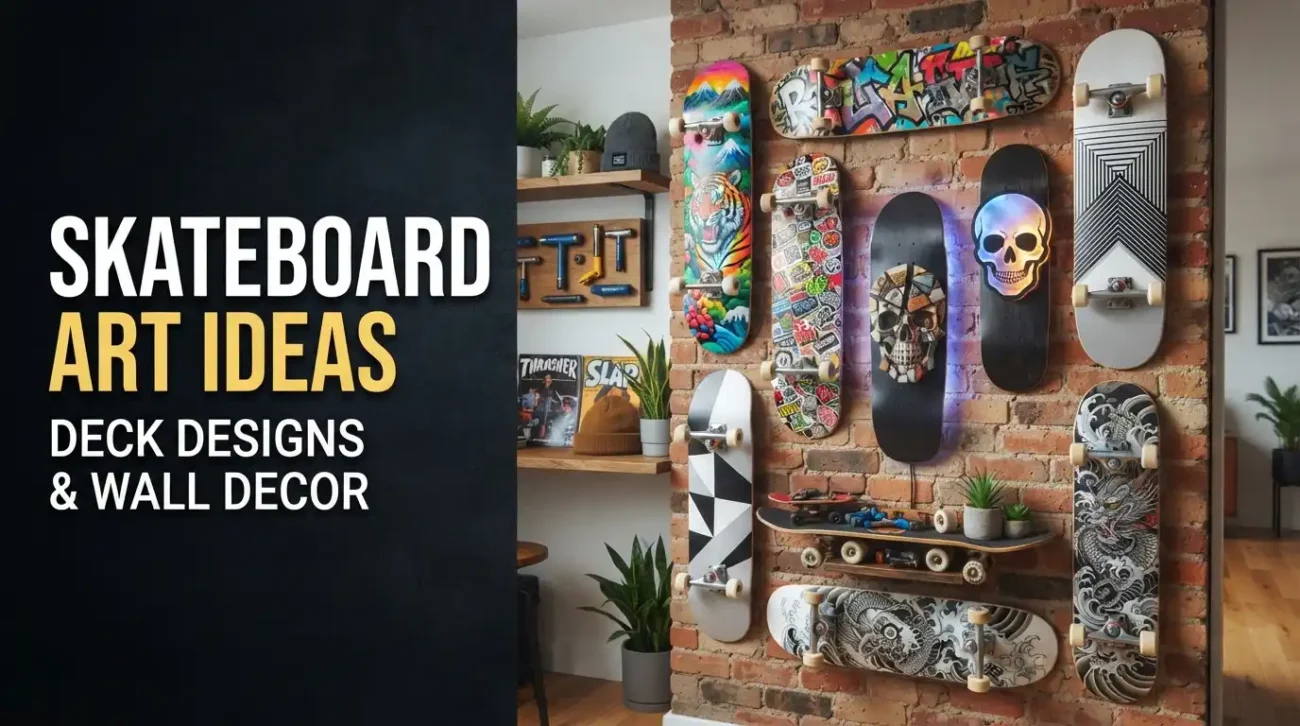
Skateboard Shelf Ideas You Can Try
There are several ways to customize this project depending on your room style.
Minimal Skateboard Shelf
Use a clean deck, black brackets, and only one or two items. This works well in a modern room.
Colorful Skater Shelf
Use a deck with a bright graphic and add colorful decor pieces. This looks great in a teen bedroom or creative studio.
Floating Look Skateboard Shelf
Use smaller hidden-style brackets if you want the shelf to look like it is floating. Just make sure they are strong enough.
Double Deck Shelf
Mount two skateboard shelves one above the other. This gives more storage and looks like a wall display.
Old School Skate Shelf
Use an older, scratched deck and keep the wear visible. This gives the shelf more personality.
Common Mistakes to Avoid
The biggest mistake is treating the skateboard shelf like a heavy-duty storage shelf. It is not made for heavy loads unless you use strong hardware and mount it into studs.
Another mistake is using weak brackets. Thin decorative brackets may look nice, but they may not support the curved deck properly.
Also, do not mount the board without checking level. A skateboard deck already has curves, so if the shelf is also slightly crooked, it becomes very noticeable.
Avoid using damaged decks with cracks near the center. That is where the shelf needs strength.
And finally, do not place fragile items near the rounded edges unless they are stable. A skateboard shelf is narrow compared to a normal shelf, so item placement matters.
How Much Weight Can a Skateboard Shelf Hold?
This depends on the deck, brackets, screws, and wall type.
For a normal DIY setup with two brackets and drywall anchors, I would keep it light. Think small decor, not heavy storage.
If mounted into studs with strong brackets, it can hold more, but I would still avoid pushing it too far. The goal is useful wall storage with style, not replacing a garage shelf.
A safe rule is to test it slowly. Add one item at a time and check if the shelf feels stable.
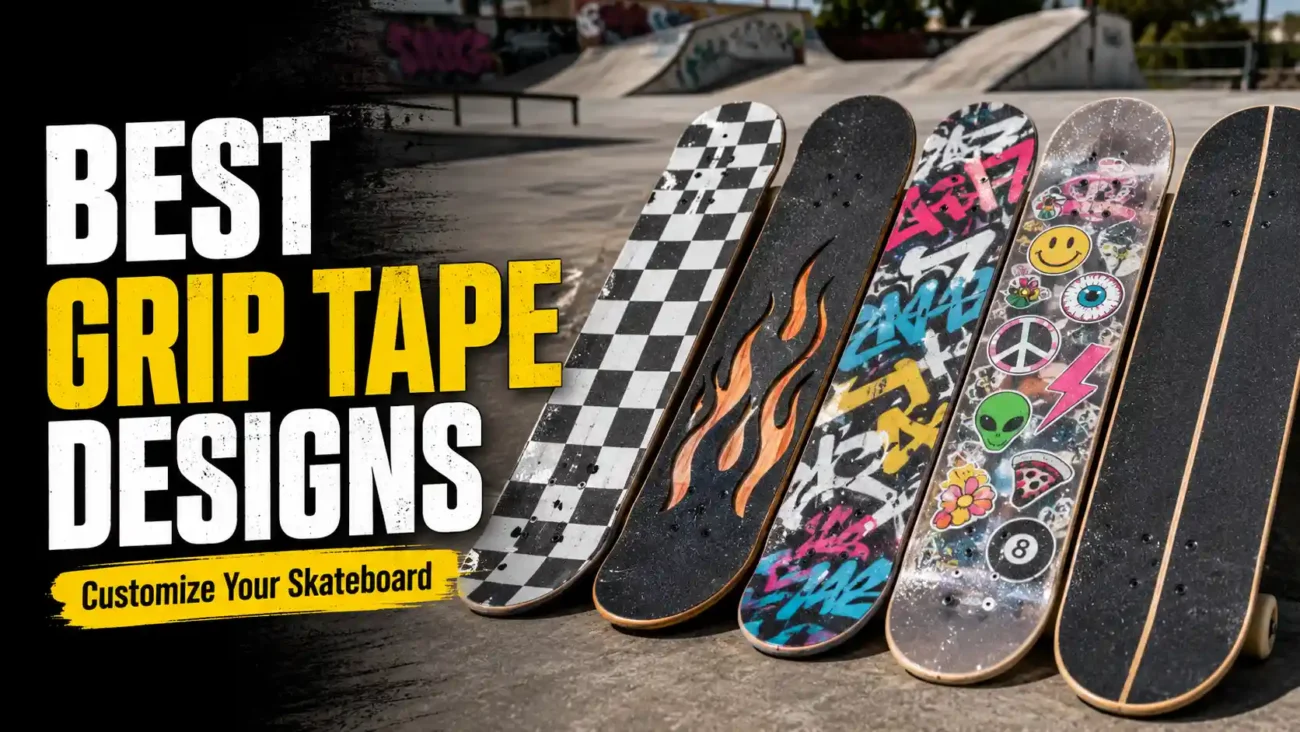
Should You Remove the Grip Tape?
You can, but you do not have to.
Removing grip tape gives the shelf a cleaner furniture-style look. But it takes work. You usually need heat from a hair dryer or heat gun, then you peel slowly. After that, you may need to sand off residue.
Leaving the grip tape keeps the project simple and gives it a real skateboard feel. For most people, I would say leave it on unless it is extremely dirty or peeling badly.
Is This a Good Beginner DIY Project?
Yes, this is a very beginner-friendly project.
The main skills are measuring, drilling, and mounting brackets. If you have never used a drill before, practice on a scrap piece of wood first. Once you understand how the drill feels, the project becomes much easier.
It is also a good project because mistakes are usually fixable. If your bracket holes are slightly off, you can adjust. If the shelf looks too plain, you can paint the deck or add decor. If the grip tape is too rough, you can cover part of it with a thin mat or remove it later.
Final Thoughts
A skateboard shelf DIY project is one of those simple ideas that actually feels useful after you finish it. You get wall storage, room decor, and a second life for an old deck that might otherwise sit unused.
The main thing is to keep the project practical. Use solid brackets, mount it properly, and do not overload it. Once it is up, style it with a few small items and let the skateboard shape do the work.
If you have an old deck with scratches, faded graphics, or worn grip tape, do not see it as trash. That wear can make the shelf look even better. It tells a little story, and that is exactly why skateboard decor feels different from normal store-bought shelves.